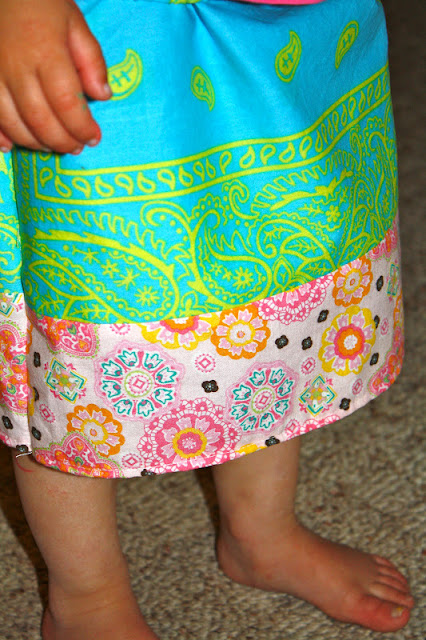
One of my sweet little former students walked up to me the other day to show me the cute skirt her Mom had made her. She told me it was 'so easy- just sew together 2 bandanas'! Well, I think it was a little more than that, but I loved how cute it was, and was determined to put one together for Adi.
As I was literally running through Wal-Mart one day last week grabbing a couple of last-minute things for Kindergarten Come & See day I happened upon the end cap that held all of their cute bandanas. For $1 apiece, I couldn't pass them up. I was in a hurry, so I quickly grabbed 2.
I googled bandana skirt tutorials, but couldn't find one that I really liked. I figured it couldn't be too hard to just make it up as I went, and if I totally messed it up- I was only out a couple dollars!
Today we had some pretty crazy stormy weather in MN, so I decided to dig in. It worked! And, most importantly- she LOVES it!
I started with 2 bandanas and a scrap of fabric that I already had on hand:
I noticed that the bandanas were really thin, so I decided to fold them in half and use the fold across the top to hold the elastic in:
When I measured around Adi's waist it was about 18 1/2", and I wanted the length about 10", give or take. I cut the ends off the bandanas so it was 15". I wanted a little bit of a gather:
I cut the bandanas to 9" in length. I trimmed the scrap fabric to 4 1/2", and also made it 15" long:
I sewed right-sides together so the fabric scrap would run along the bottom (on the opposite end of the fold):
I now had 2 pieces that looked exactly the same. I ran a stitch a tiny bit over an inch down from the fold for my elastic to run through:
Across the raw-edge of the fabric scrap piece I folded up and ironed 1/4", and then 1/4" again. I pressed it really well, then stiched it on the machine:
I sewed the front and back pieces together (right-sides together), but started from the bottom, and made sure to leave the top 1"+ a little, open for the elastic to run through:
This is what it looked like when I ran the stitch up both sides, but left the top open for the elastic to run through:
I hooked a safety pin to one end and ran the elastic through:
Then I zig-zagged the elastic together really well. After the elastic was sewn together, I hand-stitched the openings closed:
And she loved it!!!! Of course, her waist is so tiny, that like all bottoms on her, I had to roll the top down so it would stay up:
It's perfect for her! She will love running around in this at the cabin:
Now I'm anxious to try it again with a different pattern- there were lots to choose from! Let me know if you give this a try! I'd love to see it and hear how it went!


7 comments:
SUPER cute! So creative, you are ;)
i'm so impressed! this is adorable. i just love it! if i had a sewing machine or any ability to sew, i'd be all over this.
oh my goodness - that is adorable! i want one in my size!
oh that is SO cute!!!
love it :)
So so cute!
How cute! I so want to learn to sew ;)
Maybe this summer I can make time to learn. I sort of know but need to practice.
Thanks for always stopping by and leaving comments. I've been in a blog funk lately and haven't been good about returning comments. Just wanted to say I always appreciate your comments. Thanks, friend!
Great tutorial, Cuz!
Post a Comment